Joshware Quick Start Guide
Initial Setup
Download
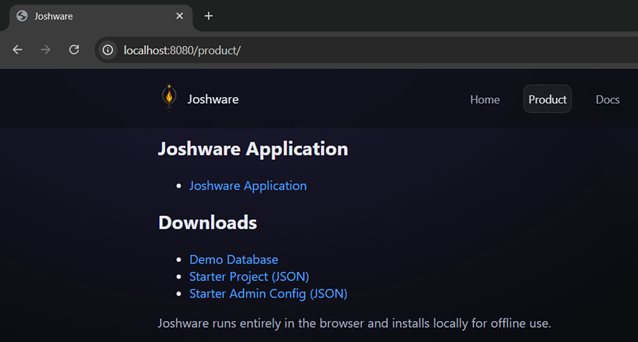
· Browse to https://joshware.org/product/
· Download the Joshware Demo Database
· Download the Joshware Starter Project
Setup
· Browse to https://joshware.org/product/JOSHWARE/index.html
· Click “Open Project”
Open Starter Project
· When prompted, select joshware_project_default.json and click Open
· Log in using the default credentials:
· Username: integrator
· Password: root
· You should now be looking at the blank canvas.
Import Drawings
Before Importing Drawings (Important)
· Before importing your PDF drawing set, determine the correct page size.
· Page size directly affects:
· measurement accuracy
· coordinate exports
· downstream takeoffs
· While Joshware allows page size changes after import, having the correct size beforehand is strongly recommended.
· Use any method available to determine page size (for example, checking the PDF’s Print dialog).
Page Size Notes
· Architectural page sizes are often written as Width × Height (W × H)
· If a page is landscape, it must still be entered as W × H
· Example:
· Arch E1 is entered as 42 × 30 (W × H) in Joshware
· Even though it is commonly referenced in portrait orientation elsewhere
Import PDF

· Once PDF Page size is known select File>Ingest PDF as Pages
· Select your drawing set, select Open

· Type the number of pages you wish to import (you may import additional pages from the same PDF document later one at a time)
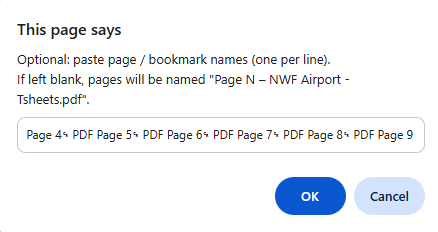
· Optional, leave blank or paste in the page names per the instructions, select OK
· Select OK
· You should now be sitting on page one of your document
Connect Database
· Unzip “Demo Database.zip”

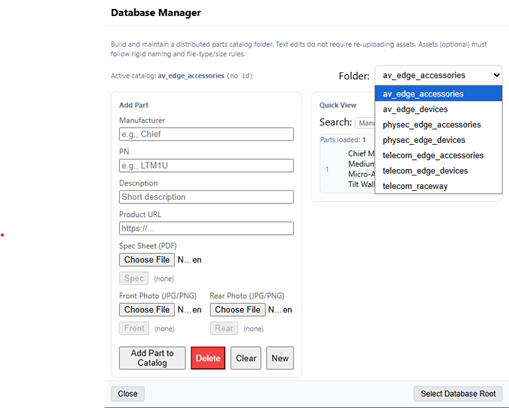
· From the ribbon select Managers>Database Manager
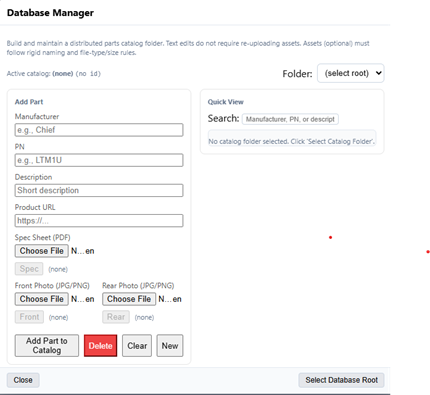
· Click Select Database Root
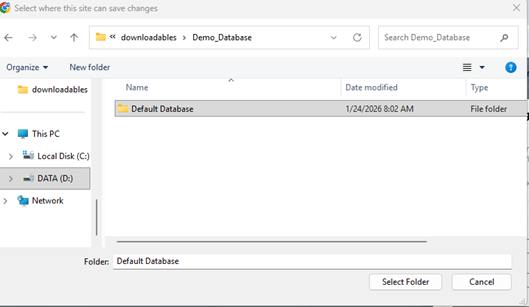
· Select folder “Default Database” that resides inside the parent folder you previously unzipped (Demo_Database).
· Click “Select Folder”

· Click “Allow”

· The Folder dropdown in the Database Manger should now contain all of the subfolders in the Default Database directory.
· Select Close.
· Your Default Database is now connected.
· Select Close on the Database Manager.
Basic Navigation
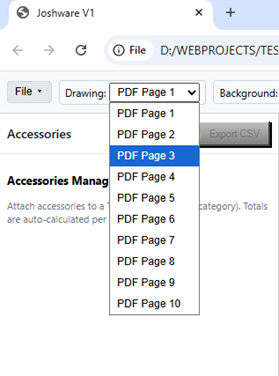
· Use the Drawing Dropdown Menu to select PDF pages.

· Use Embedded PDF Zoom feature for zooming in
· Use Mouse Wheel to scroll vertically and Shift+Mousewheel to Scroll horizontally
Working with Symbols
Preconfigured Symbols
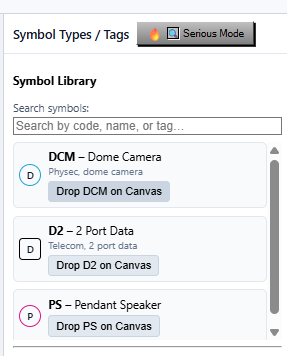
· Select a preconfigured symbol from the Symbol Library on the right
· Click anywhere on the page to drop device tag on the page
· Use [ ] to resize symbols
· Symbols may be copied (ctrl+c) and pasted (ctrl+v)
· Symbols may be selected in groups using ctrl+click
· Symbols may be moved or resized in groups
· When Nerd Mode is toggled all symbols remain selected
· Delete removes a selected symbol along with its entry in the device explorer
Save Project
· Select File>Save Project
· Your work has been saved and it is now safe to close browser
Joshware Admin Guide
Admin Workspace
General Overview
· Every Joshware project belongs to an Admin Instance.
· The Admin Instance is the security and permission boundary for your organization. It determines who can access projects, what actions they can perform, and how credentials are managed.
Key Concepts
· Admin Instance
o A logical container that owns one or more projects.
o All permission and role management happens at the Admin Instance level.
· Project Ownership
o Admins can only manage permissions for projects that belong to their Admin Instance.
o Projects cannot be administered across instances.
· User & Permission Control
o Admins are responsible for:
§ Creating and managing usernames
§ Assigning password
§ Defining user roles and access levels
o It is recommended that Admins maintain full control over credentials to ensure consistency and security.
Best Practices
· Use a single Admin Instance per organization.
· Restrict admin access to trusted users only.
· Assign roles intentionally to avoid accidental changes to critical project data.
· Treat the Admin Instance as the authoritative source for access control.
Admin How To (Step
by Step)
Login Into Admin Workspace
· Browse to https://joshware.org/product/JOSHWARE/index.html
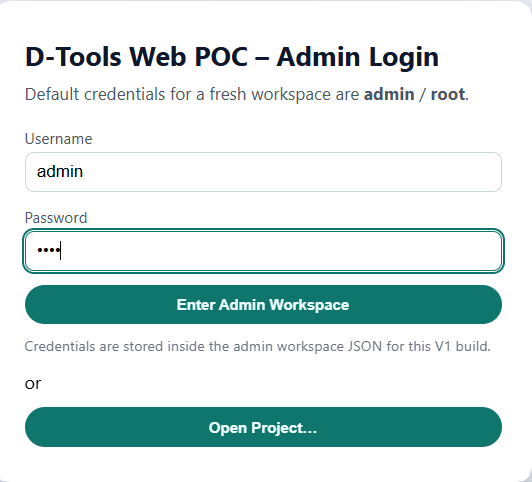
· Enter Default credentials username admin, password root.
· Select Enter Admin Workspace.
Admin Workspace at a Glance
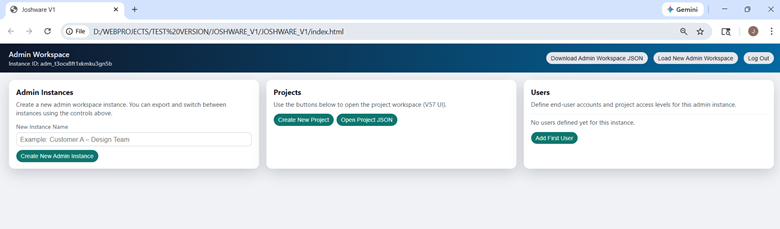
· In the top right corner, the default Instance ID is shown. Joshware generates a unique admin Instance ID upon login.
· Download Admin Workspace JSON: saves your current admin workspace in a new admin.json file.
· Load New Admin Workspace: Loads a saved admin.json file.
· Logout: Logs out of the default instance and returns to the splash page
· Create New Admin Instance: Creates a new admin instance with the desired instance name. Do this before creating users
· Create New Project: Creates new project. Before creating project create users first
· Open Project Json: Loads existing project JSON. Project JSON must belong to the current admin instance, or it will not load. Make sure users are configured prior to loading project
· Add first User: Adds first user, do this after creating new admin instance and before creating or loading project.
Admin Workspace
Operations Step by Step
Create New Admin
Instance

· Enter Instance name into New Instance Name Field (organization name recommended)
· Select Create New Admin Instance
· Select OK
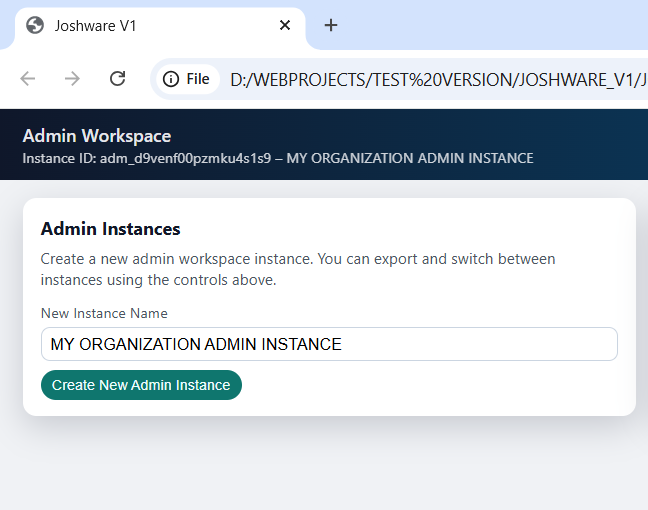
· You should now see your new Admin Instance Name in the top right corner of the screen above the Admin Instances box.
Add Users
· Select Add First User
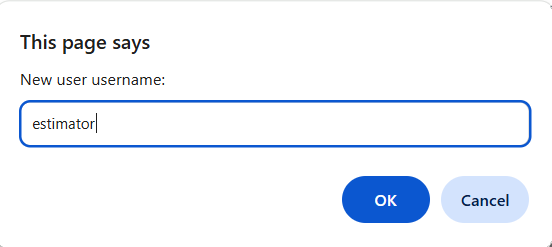
· Enter username for user, in this example we are using the username “estimator”
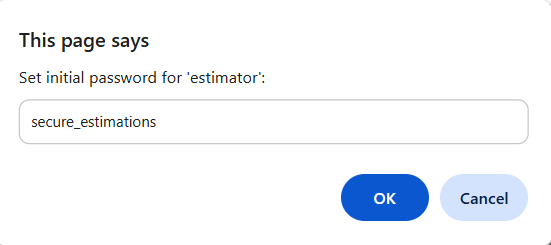
· Enter password for user
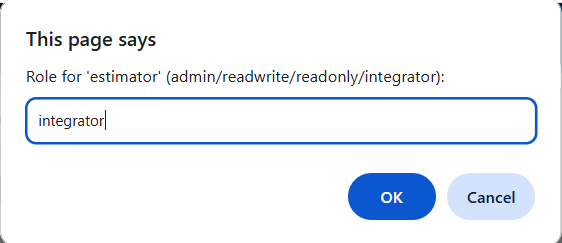
· Choose role: type the desired role name
o admin: same as read/write
o read/write: user with read and write privileges
o readonly: user with readonly privileges
o integrator: read/write and access to integrator only fields
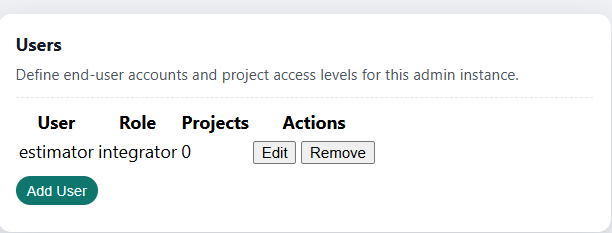
· You should now see your created user in the Users box
Save and Reload
· Before creating your first project, we recommend saving your Admin Workspace session and then reloading it after your Admin Instance and Users have been created.
· This ensures:
o Your Admin Workspace session is recoverable if anything goes wrong.
o You don’t accidentally start building a project and later realize you forgot to save the admin session that owns it.
· Confirm your admin instance and users are created then select Download Admin Workspace JSON. Once the JSON file is in your downloads folder it is safe to close the browser.
· We recommend naming the admin.json file with a descriptive name such as your Admin Instance name.
· In the JOSHWARE_V1 folder double click index.html
· Log in with default credentials username admin, password root
· Select Enter Admin Workspace
· Select Load New Admin Workspace
· Select the adm.json file you previously downloaded, then click open
· You should now see the message saying your admin instance loaded, click OK.
· You should now see your Admin Instance Name in the top right corner and your users.
· It is now safe to create a new project.
· Simply hit “Create New Project” and you will be taken to the New Project Setup Wizard.
Adding and Removing Users From Saved Projects
· To add or remove users from an existing (saved) project, user access must be configured through the Admin Workspace.
·
How It Works
o First, configure the users, roles, and passwords you want assigned to the project in the Admin Workspace.
o Then, load the saved project into the Admin Workspace.
· Although it may appear that the project opens directly, this process stamps the project with the user, role, and password configuration currently loaded in the Admin Workspace.
·
Important Notes
o User changes are applied at load time, not by editing the project file directly.
o The Admin must own the project (the project must belong to the Admin Instance) in order to add or remove users.
o Projects cannot have users modified by Admins outside of their Admin Instance.
Joshware Project Guide PDF Import & Database
Page Size Considerations
Before Running New Project Wizard (Important)
· Before importing your PDF drawing set, determine the correct page size.
· Page size directly affects:
· measurement accuracy
· coordinate exports
· downstream takeoffs
· While Joshware allows page size changes after import, having the correct size beforehand is strongly recommended.
· Use any method available to determine page size (for example, checking the PDF’s Print dialog).
Page Size Notes
· Architectural page sizes are often written as Width × Height (W × H)
· If a page is landscape, it must still be entered as W × H
· Example:
· Arch E1 is entered as 42 × 30 (W × H) in Joshware
· Even though it is commonly referenced in portrait orientation elsewhere
New Project Wizard
· From Admin Workspace select “Create New Project”. (For help setting up Admin Pages see Joshware_Admin_Guide.pdf.)
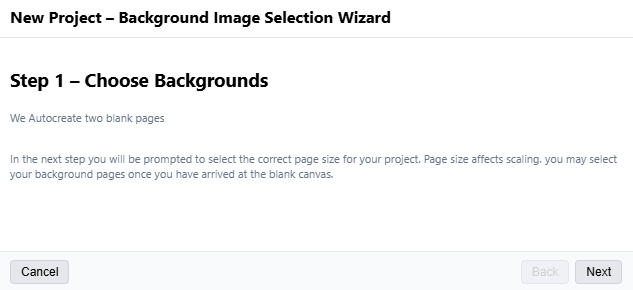
· Select Next on Step 1
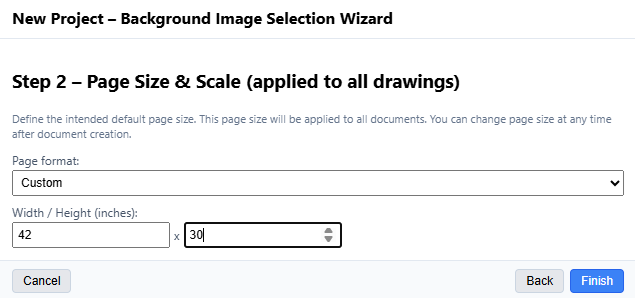
· Pause here to find the anticipated page size of the PDF you plan to import. Page size affects drawing scale. 42x30 (Arch E1 Landscape) is the most common Architectural page size.
· Select Page format from the dropdown menu. Joshware supports custom page sizes. The page size selected during the wizard becomes the default page size during the PDF import. Page size can be changed later, one page at a time after PDF Import.
· once Page size is configured, select Finish.
Import PDF
· Once PDF Page size is known select File>Ingest PDF as Pages
· Select your drawing set, select Open
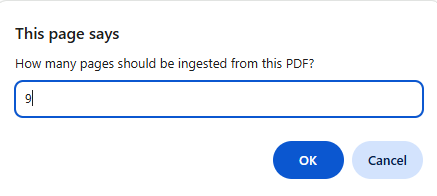
· Type the number of pages you wish to import (you may import additional pages from the same PDF document later one at a time)

· Optional, leave blank or paste in the page names per the instructions, select OK
· Select OK
· You should now be sitting on page one of your document
Save Project
· This is good place to save your progress before continuing. Select File>Save Project.
Create Database Directories
Database Considerations
· If you do not already have a parts database and are not using the Default Database, you will need to decide on a directory structure for your Parts Database before connecting it to Joshware
How the Database Works
· A Joshware database is simply a directory (folder) that you allow Joshware to access.
· Joshware automatically recognizes subdirectories within the selected parent database folder.
· There is no required schema or special file format — folder structure is the organization.
Recommended Setup
· Choose a single parent database folder.
· Create several subfolders inside the parent folder before connecting it to Joshware.
· Use subfolders to group parts by device category.
Example Directory Structure
· Access Control
· Cameras
· Readers
· Door Hardware
· Power Supplies
Closing Note
· This approach keeps your database organized, scalable, and easy to navigate as it grows.
Connect Database

· From the ribbon select Managers>Database Manager

· Click Select Database Root

· Select folder the parent folder of your database.
· Click “Select Folder”
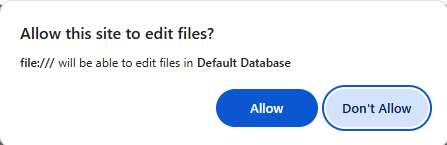
· Click “Allow”
· The Folder dropdown in the Database Manger should now contain all of the subfolders in the parent folder directory.
· Select Close.
· Your New Database is now connected.
· Select Close on the Database Manager.
Joshware Project Guide – Ribbon & Navigation
Project Canvas
Top Ribbon
· Like most software workspaces, Joshware contains a Top Ribbon that nests many of the UI functions
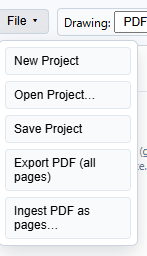
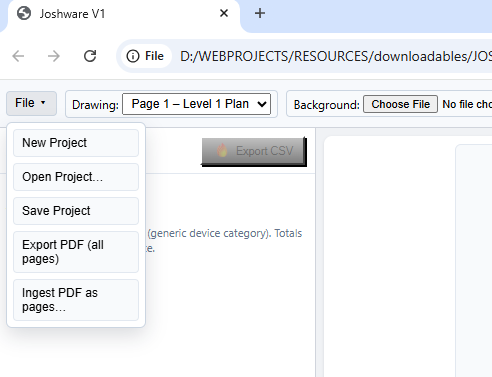
· The File consists of the following functions:
o New Project:New blank canvas.
o Open Project: Open saved project.json file.
o Save Project:Saves the state of current project to new project.json file
o Export PDF (all pages): Exports all active pages in the project to pdf for printing or saving
o Ingest PDF as Pages: Import multi page PDF into document

· Drawing Dropdown: Selects the page of the pdf displayed
· Choose File: Replaces the current background with an SVG image
· Choose PDF Page: Replaces the current background with a PDF page from the embedded PDF, even if is a page you did not import or already deleted.
· Managers: Dropdown for manager modules, managers will be discussed later
· Nerd Mode: Selects all symbols on page when toggled. While toggled arrows left/right and up/down adjust the distribution and alignment of symbols
· Auto Prune: Removes every page that does not currently have a symbol on it.
· Embedded PDF Zoom: Safe zoom for JS Rendered PDFs
· Measure: Toggles measuring tool
· Scale Dropdown: Changes scale of measuring tool
· Calibration: Adjust calibration of scales to allow for PDF drift and PDF margins. Pro tip, calibrate your scale until a double door opening reads approx. 6’ and a single door reads at approx. 3’.
· Serious Mode: Minimizes UI when toggled
Basic Navigation

· Use the Drawing Dropdown Menu to select PDF pages.
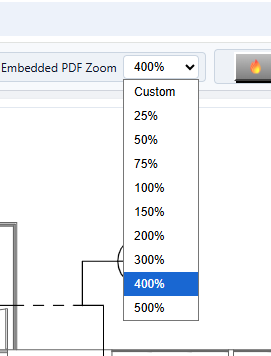
· Use Embedded PDF Zoom feature for zooming in
· Use Mouse Wheel to scroll vertically and Shift+Mousewheel to Scroll horizontally
Joshware Project Guide – Symbols, Types & Parts
Create Parts
· From the ribbon select Managers and Database manager. Connect to your database directory. See Joshware Admin Guide for help connecting to your database.
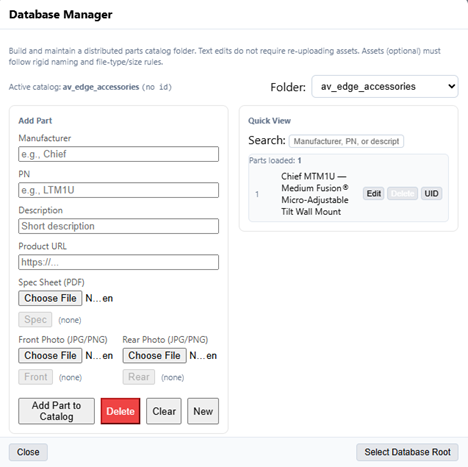
· Fill out the Database entry for the part you are entering. It is recommended to upload spec sheets and photos. Spec sheets and photos become clickable from the project canvas if they are available.
· Once the database entry is fille out select Add Part to Catalog.
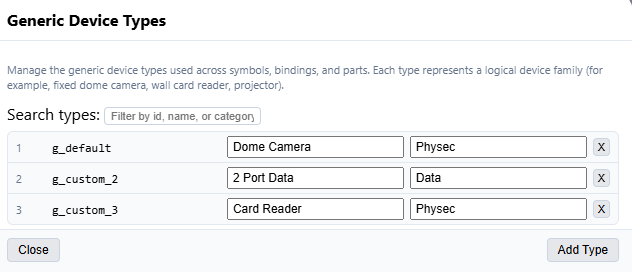
Create Types
· Select Managers>Types. Fill out the Device type fields with your generic device types and the categories the belong to.
Manage Local Database
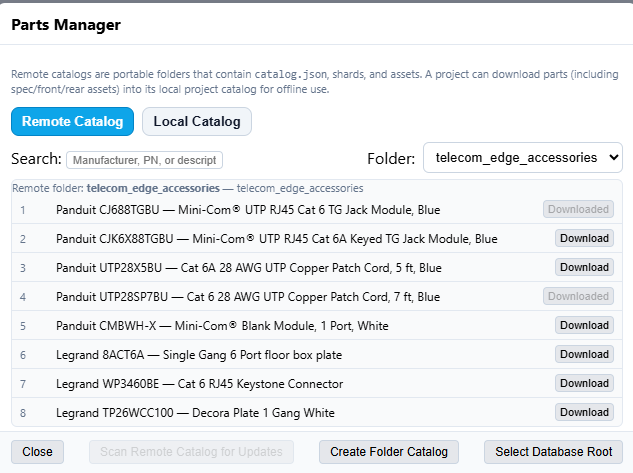
· Download the parts from the remote database into the local database
· Select Managers>Parts Manager.

· Select the correct folder from the Remote Catalog Dropdown Folder
· Select the part from the global catalog you wish to download into the project.
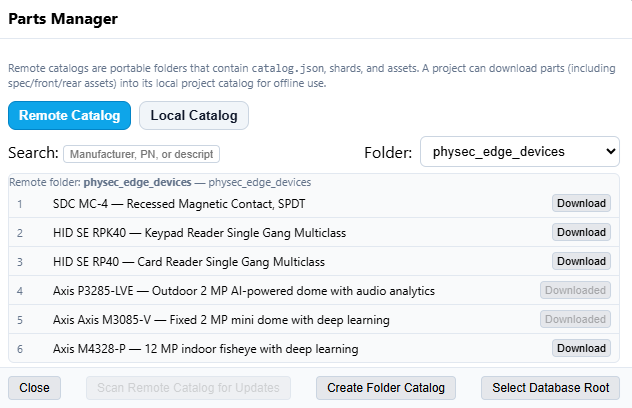
· Select the part from the global catalog you wish to download into the project, then click Download.
· Once parts are downloaded form the Remote Catalog, click the Local Catalog tab.
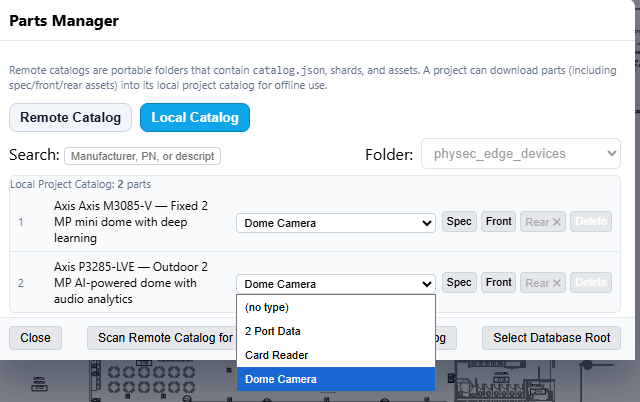
· Click the Type dropdown to associate the part with the Generic Device Type
· Select Close
Create the Symbol
· Select Managers>Symbols
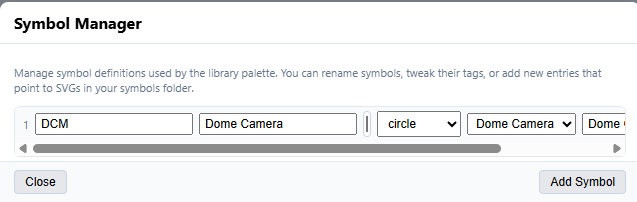
· Enter the characters that will appear in the symbol. For best results limit number of characters to three. In this example we used “DCM” to represent “Dome Camera.
· Enter the name of the Symbol Type
· Chose symbol shape from dropdown
· Select symbol color from the color picker
· Associate the Device Type on the Dropdown
· Add search tags.
· Select Close
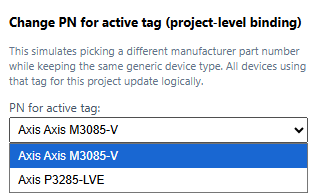
· If you have associated more than one part to the Device type in the Local catalog page then select the Part to bind to this type in the “Project-level Tag Binding Menu”
· Drag a symbol and drop it.

· Placing symbols creates and entry in the device explorer. The entries in the device explorer are clickable and searchable.
· When a symbol is selected, its thumbnail is visible in the lower left corner. Also, a clickable link to the spec sheet appears above the photo.
Joshware Project Guide – Accessories & Exports
Accessories
· Once a symbol is placed on the canvas, it is then possible to attach other parts to the device type, the symbol is associated to.
· Attaching the accessories to the type instead of to the part allows the Part Number to be swapped without re-attaching accessories
· An accessory can be any part in the database. At Joshware we typically define an accessory as a part that cannot be sold individually and requires a parent device to function.
· Ensure your accessory device is created in the database and downloaded into the project. See Project Guide Symbols, Types and Parts.
· In this example we have downloaded Cat 6 Jacks to install into a modular 2 port face plate. We have also downloaded 7 ft patch cords to go with the 2-port face plate as well
· Select Close
· Once the symbol is dropped on the page, if it has a type associated with it, the type for that symbol will appear on the Accessories tab along with the Quantity of instances the type appears on the page.
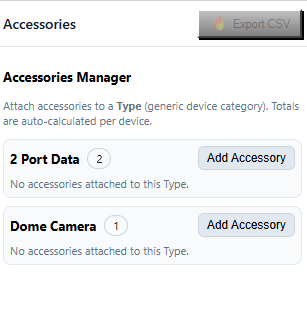
· Select Add Accessory
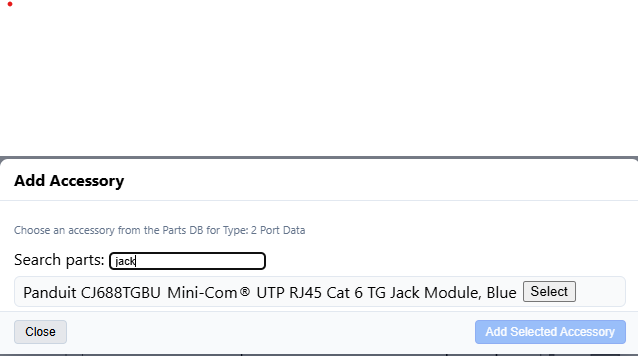
· Locate the accessory. Use the search tab in the menu to filter results from the database
· Click Select>Add Selected Accessory
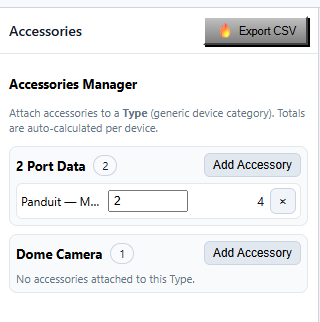
· The quantity of the accessory can be adjusted. In this example a quantity of 2 Cat6 Jacks per 2 Port Face Plate specified. Accessories can be removed from the Generic Device Type by clicking on the X.
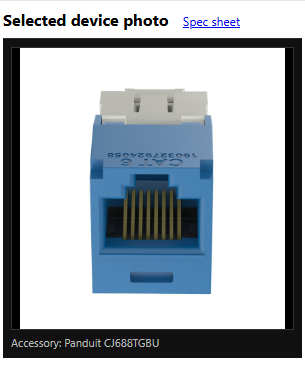
· Clicking a row in the Accessories Manager displays the Accessory’s thumbnail and a link to its spec sheet.
Exports
· The Accessories can be exported to CSV by pressing the Export CSV button in the Accessories Manager.
· The Device Explorer Can be exported by pressing Export CSV in the device explore Window.
· All active canvas pages may be exported by selecting File>Export PDF
Using Joshware Offline
Offline Use
·
Joshware is designed to continue working when the internet is
unavailable.
Once opened online, the application installs locally in your browser and can be
used offline without special setup.
Initial Setup
· Open Joshware while connected to the internet
· Browse to https://joshware.org/product/JOSHWARE/
· Allow the application to fully load
· Bookmark the page for future use
Working Offline
· Joshware does not require an internet connection after it has been opened once
· When offline, the application, the application automatically uses locally cached files
· All tools, drawings, and exports continue to function normally
To Use Joshware Offline
· Open your browser
· Use your bookmark to open Joshware
· Open an existing project or create a new one
· No sign-in, no reconnection steps
When an Internet Connection is Required
· First-time application load
· Loading application updates (when available)
· Offline work is not blocked or interrupted by loss of connectivity
Data & Privacy
· Project files remain local
· No telemetry or usage tracking
· No background uploads
· Collaboration is done by sharing project files
· Your data never leaves your system unless you choose to share it
How to Verify Offline Mode
· Load Joshware while online
· Open browser developer tools
· Enable “Offline” mode
· Refresh the page
· Joshware should continue to load and function Normally